Contents
- Channel estimation
- 1.Generate an n-length sequences of psuedo-random constellation values
- 2.Take iDFT and add cyclic prefix to get the transmitted OFDM frames
- 3.Then Transmit the sequence in a channel
- 4. Remove the cyclic prefix for the received signal and average the received signal
- 5. Take DFT and divide by the constellation value to get the frequency response of the channel
- 6. Finally take the iDFT to get the impulse response of the channel
- Channel Synchronization
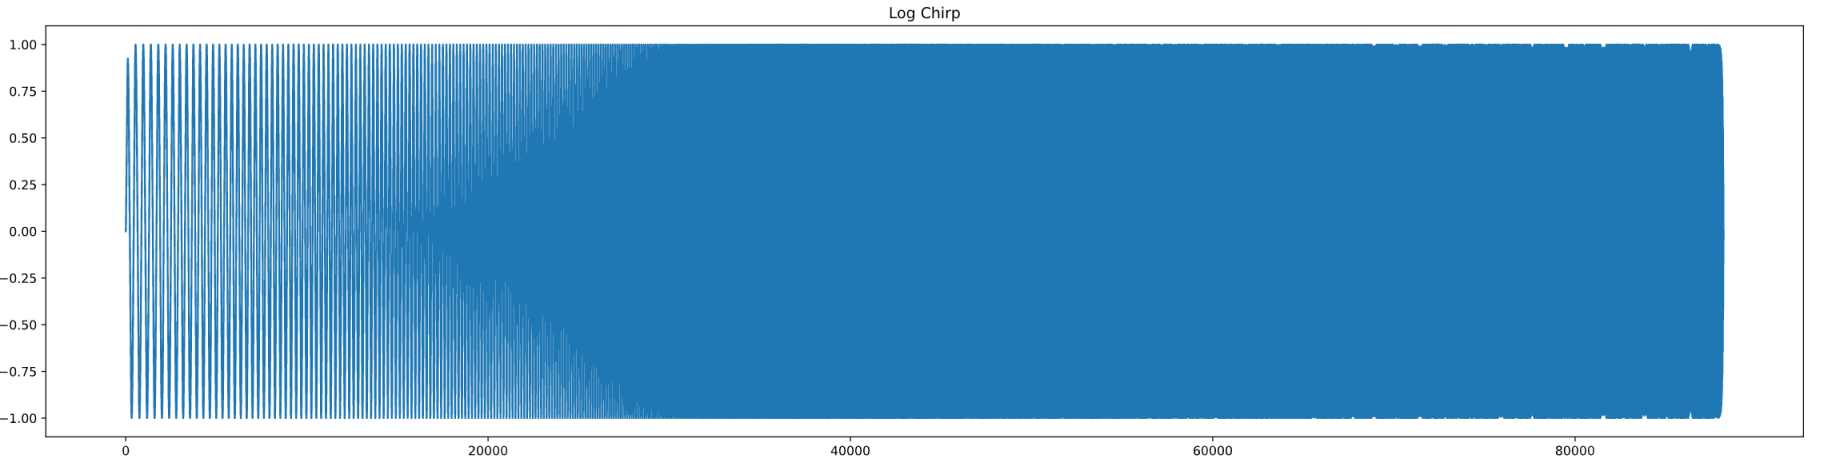
- 1. Generate a log chirp signal
- 2. Concatenate the Known OFDM symbol with the chirp signal
- 3. Peak detection with matched filter
- 4. Fine tuning the synchronization
- Tips for measurements
- Some channel measurements
- Comments
Channel estimation
1.Generate an n-length sequences of psuedo-random constellation values
-
By means of psuedo-random, we can either use a known seed number in numpy for generating random numbers. Or we can simply taken some values of some digits of π
-
My approach of doing this is to first generate a length of 12 random integers:
1
2
random_array = np.random.randint(0,100, int(50/4))
random_array
array([86, 35, 76, 39, 41, 46, 95, 38, 5, 63, 34, 95])
- Then turn this integer array (bytes) into binary strings:
1
2
3
4
5
bin_strings=''
for byte in random_array:
    binary_string = '{0:08b}'.format(byte)
    bin_strings+=binary_string
bin_strings
'010101100010001101001100001001110010100100101110010111110010011000000101001111110010001001011111'
where the length of this binary strings should be 12 * 8 = 96
- Then use the helper function for turning binary codings into complex constellations (Here QPSK is used):
1
2
3
constellation = encode_bitstr2symbols(bin_strings)
print(len(constellation))
print(constellation[0:5])
48 [(-1+1j), (-1+1j), (-1+1j), (1-1j), (1+1j)]
- By using random OFDM blocks and averaging over the channel estimation, you get better channel estimation.
2.Take iDFT and add cyclic prefix to get the transmitted OFDM frames
1
2
3
4
5
# ----iDFT----
frames=np.fft.ifft(constellation)
# ----add cyclic prefix----
cyclic_prefix = frames[len(constellation)-prefix_no:len(constellation)]
frames = np.append(cyclic_prefix, frames, axis=0)
where here prefix_no = 32
- Adding cyclic prefix is optional, the results should be the same.
3.Then Transmit the sequence in a channel
Either turns the numpy array into a .wav file and send it to the phone and let the python program record the sound. See the synchronization implementation below.
Or use a simulated channel to test the system if it works
1
2
sim_channel = np.array([0.5, 0.25, 0.0, 0.25])
plt.plot(sim_channel)
- Use a linear convolution to convolve the transmitted OFDM frames with the simulated channel response to obtain the simulated received signal:
1
channel_out = np.convolve(frames, sim_channel)
4. Remove the cyclic prefix for the received signal and average the received signal
1
recorded = channel_out[32:48+32]
here since using a simulated channel, no noise, therefore averaging is not required
5. Take DFT and divide by the constellation value to get the frequency response of the channel
1
2
recorded_frequency = np.fft.fft(recorded)
freq_response = recorded_frequency / np.array(constellation)
6. Finally take the iDFT to get the impulse response of the channel
1
2
impulse_channel = np.fft.ifft(freq_response)
impulse_channel[0:4]
array([5.0e-01+3.8e-17j, 2.5e-01+5.9e-18j, 1.7e-17+4.3e-18j, 2.5e-01+6.5e-18j])
where this is very close to our initial simulated channel and we’ve proved this method works.
Channel Synchronization
One of the most robust way of doing this is using chirps signal for synchronization:
1. Generate a log chirp signal
Chirp is a sinusoidal signal that sweeps a range of frequencies. \textrm{chirp}(t) = \frac{1}{5}\sin\left{ 2\pi f_1 T * \frac{( f_2 / f_1)^\frac{t}{T} - 1}{\ln(f_2/f_1)}\right} \underbrace{(1- \exp^{-kt})(1-\exp^{k(t-T)})}_{\textrm{Exponential smoothing with }k=50}
1
2
3
4
5
6
7
8
9
10
11
12
13
14
15
16
17
def define_chirp():
    """returns standard log chirp waveform and its time-reverse"""

    sec = 1
    k = 100
    w1 = 60
    w2 = 6000

    t = np.linspace(0, sec, int(fs*sec))

    chirp = np.sin(2*np.pi * w1 * sec *
            (np.exp( t * (np.log(w2 / w1) / sec)) -1) /np.log(w2 / w1) )
    chirp *= (1-np.exp(-k*t))*(1-np.exp(-k*(sec-t))) / 5

    inv_chirp = np.flip(chirp)

    return chirp, inv_chirp
2. Concatenate the Known OFDM symbol with the chirp signal
1
2
3
4
5
6
7
8
9
10
11
12
def tx_waveform_data(frame, chirp, repeats, filename):

    frames = np.tile(frame, repeats)

    bits_tran = file_to_bitstr(filename)
    symbols_tran = encode_bitstr2symbols(bits_tran)
    data_tran = symbol_to_OFDMframes(symbols_tran,N,prefix_no)
    data_tran = np.real(data_tran)
    data_length = data_tran.shape[0]*data_tran.shape[1]
    waveform = np.concatenate(( chirp, frames, data_tran), axis=None)

    return waveform, repeats, data_length
where the frames is the known OFDM symbols for channel measurements and the data_tran is the actual file we needs to transfer.
![]()
3. Peak detection with matched filter
By convolving the signal with matched filter - time inverse of the chirp signal, we would be able to get a peak at where the chirp signal ends.
1
2
3
4
5
6
7
def matched_filter(signal, match):
    """Returns convolution of signal with matched filter and its peak index"""

    convolution = np.convolve(signal, match)
    peak_index = np.argmax(convolution[0:len(convolution//2)])

    return convolution, peak_index
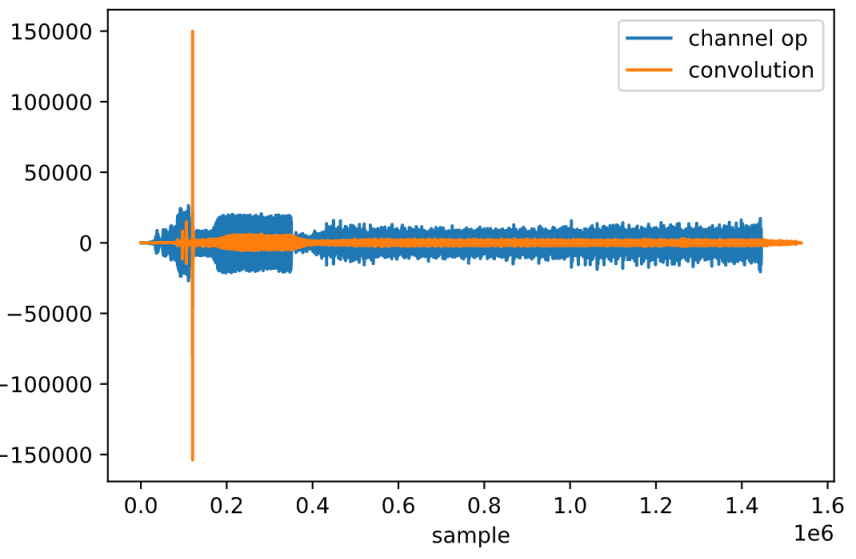
With some further calculation, we can easily determine where the signal starts. Therefore, rough synchronization is achieved.
4. Fine tuning the synchronization
-
With the previous mentioned steps, a rough synchronization could be achieved. However, if better synchronization is desired, some fine tuning should be used.
-
The method for fine tuning the synchronization is based on calculating a score for each of the impulse response with different offset and then select the one with the highest score.
-
For showing that this method actually work, a figure for bit error rate against impulse score is plotted. Notice that since during actual transmission, you would not known the bit error rate, therefore by using bit error rate to choose impulse response is not valid.
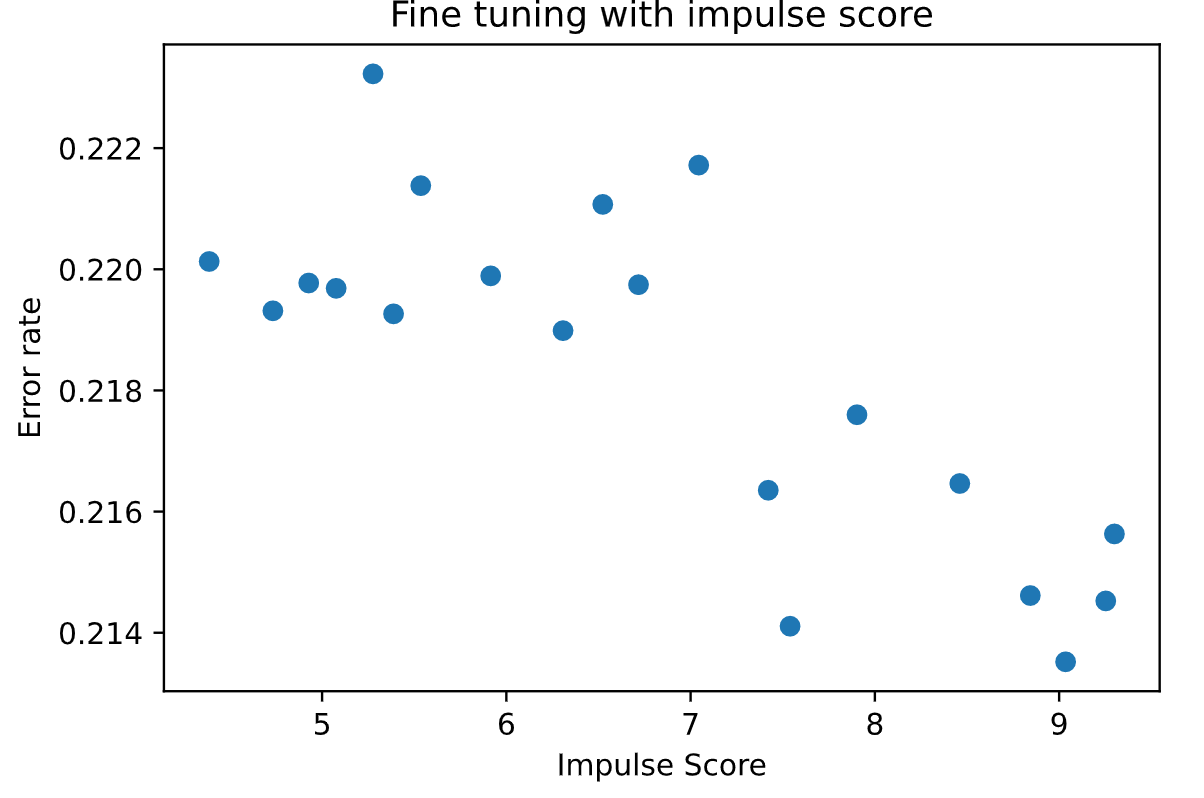
- The following block shows the code for calculating the impulse score. A length of 80 samples is chosen here, however longer can be used for various channels.
1
2
3
4
5
6
7
8
def impulse_score(impulse):
    # The input impulse should be normalised (Minus its initial mean)
    initial_no = 80
    last_no = 80
    print(np.average(np.abs(impulse[0:initial_no])))
    print(np.average(np.abs(impulse[:-initial_no])))
    score = np.average(np.abs(impulse[0:initial_no])) / np.average(np.abs(impulse[:-last_no]))
    return score
Tips for measurements
- Use a single microphone single speaker system. With more than one speaker, the recorded sound might be interfered by different microphone
- Try to place the microphone and the speaker directly facing each other.
- Try to use full volume while playing the sound.
Some channel measurements
Impulse response:
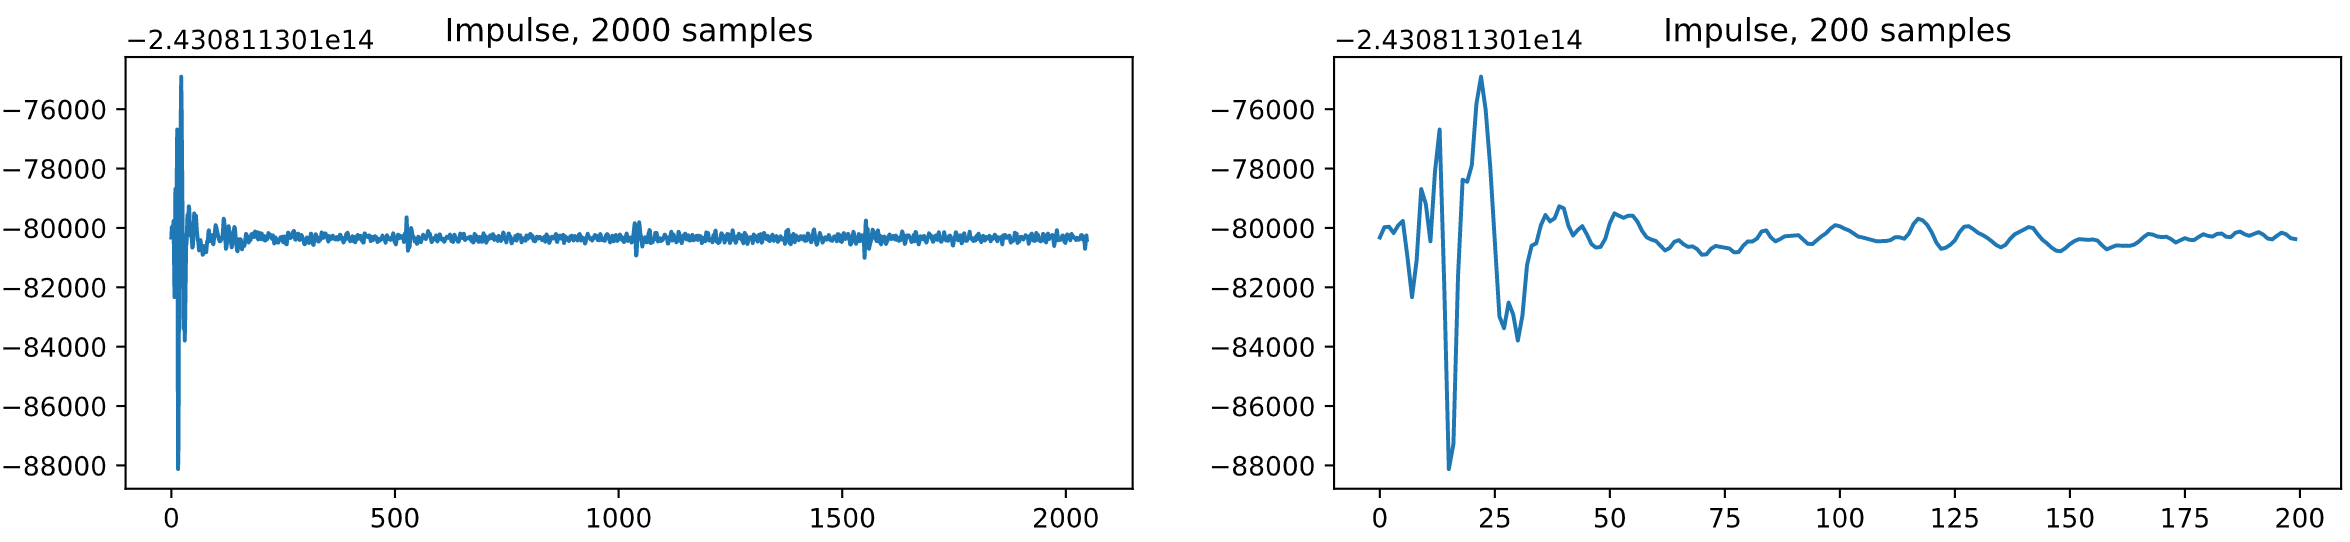
As you can see, there is this repeated small peaks at about every 500 samples. Some easy calculation can be done here:
500/44100∗340/2=1.93m
Which says that there is this obstacles at about 2 meters away from the microphone, that is my ceiling.
Frequency response:
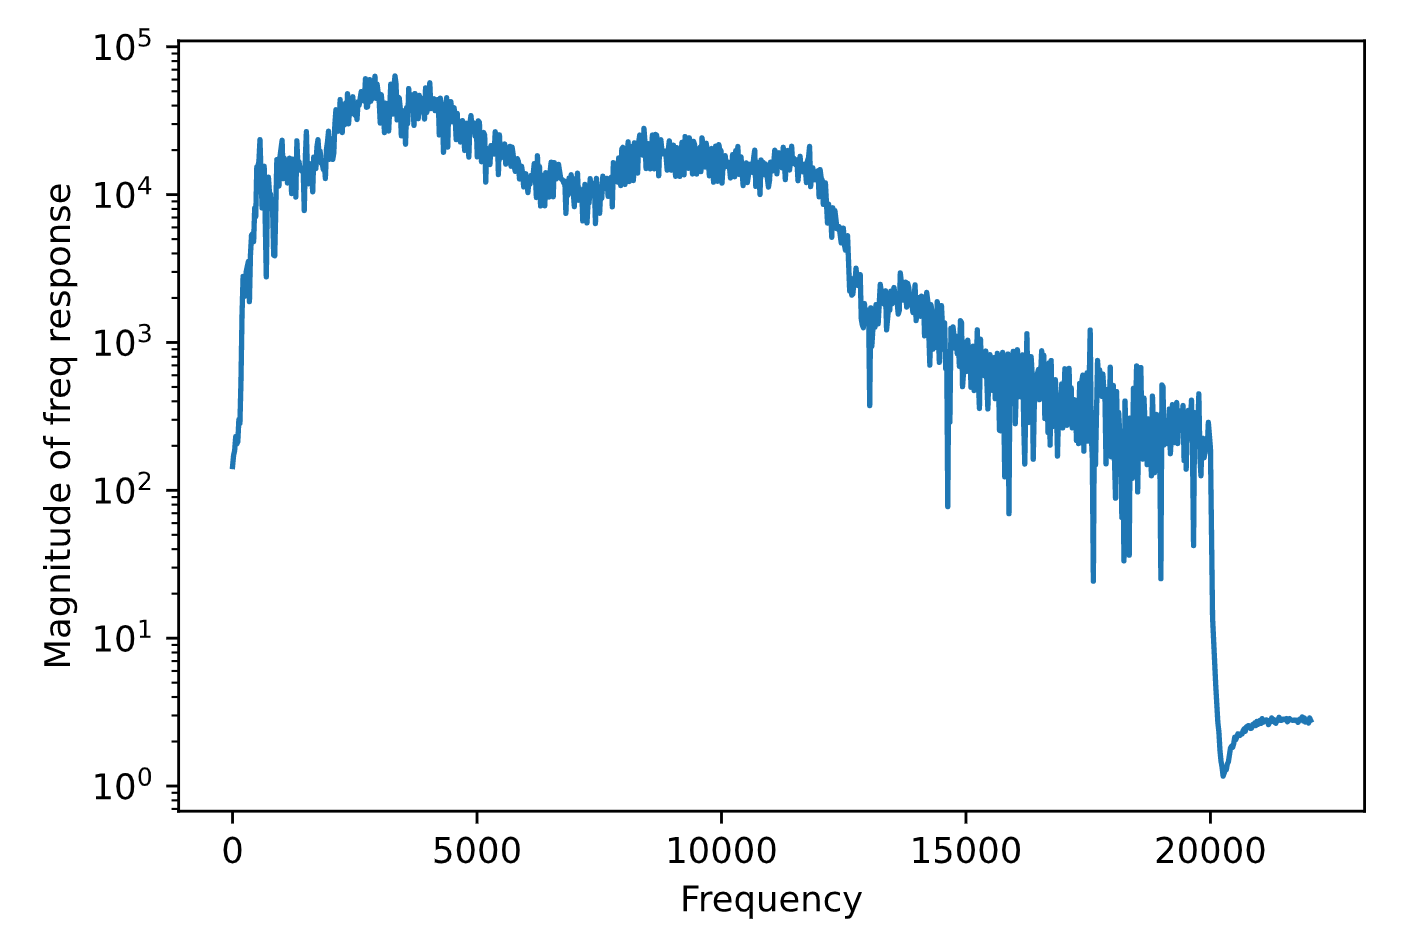 This frequency response shows some insights of the channel and the microphone. Most microphone has the drop in response after about 12khz.
Comments